Refacing sounds hard, but I have done another kitchen in the last house similar to this and it is EASY!
No miter cuts.
It does not demand an engineering degree.
So, You go buy one of these at the hardware Store. Plastic Miter board (You will be using the center straight groove!). Buy the trim molding you want. I like the plain Lattice strips that is about 1 3/4" across and 1/8" thick.
And buy one of those thin hand saws.
Next unscrew all the hinges off the doors and put them in a box or big plastic zip lock and put them in a place that you will not loose them. Sounds like a no brainier, but trust me, when you start unscrewing everything all over the kitchen it will be easy to loose pieces and not find them for days or weeks when you start putting everything back.
Trust Me, I Know.
Step 1: If you have enamel paint doors and you are going to be using the new latex
enamel paint on your doors, then you need to put a coat of liquid sandpaper
a primer on the front, back and the four sides! do not forget to do this!
Step 2: Measure the front top of door and cut lattice to length
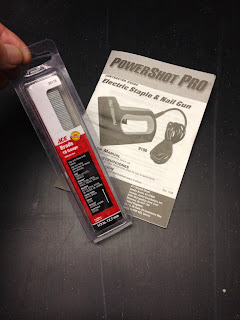
Step 3: Use an electric staple gun (way easy and better than hammer and tiny nails),
use the Brads as shown and start stapling the ends and in between. Don't go
staple gun crazy here, just make sure the lattice piece
are firm against the door.
Step 4: repeat bottom of door
Step 5: Do the same thing to the left and right sides.
Now, when this is all done, It is time to sink the brads with just a tap of a hammer and a nail set tool.
Once all brads are sunk in, then it is time for wood putty. I love to use the Durham's brand because you just add water to as much as you need. No more wasted dried up wood putty in a jar. HELPFUL HINT: Go buy the latex gloves and wear them when you paint and wood putty everything....you will thank me later....
Now you need to fill in the holes, fill in any gaps between the wood trim you cut and the door and fill in any gaps where the wood trim meets each other.
Now let the wood putty dry up for a day or two then come back and sand everything smooth. HELPFUL HINT: Do this outside. If you do it inside you will be dusting piece of furniture, lamp, floor, shelf and decorative do-dad in your house for a week....trust me I know.
My favorite tool is this mouse sander. It is easy to hold and move into corners. I sanded everything, even the sides and made sure the front lattice joints were smoothed together and looked like the same level... sometimes your strips won't be cut the same depth and you joined two that are a bit different. Don't sweat it, just sand down the high piece and the corners will look even and it will be fine.
Now, prime the raw wood and wood putty spots with a wood primer and let them sit for at least 24 hours. If it is humid, then wait a few days. (finally I found a picture)
Now you are ready to paint. Take your time. You don't have to do this all in one day you know. You can buy a sprayer and spray on your paint or you can use a paintbrush like me and do it the old fashioned way. Just put on 2-3 coats on all the surfaces. I am not showing you a picture because it would ruin the TA-DA ending.
Place your doors in a safe traffic free zone and let the paint harden. Do not stack the doors together because they will stick together!!!! Just lean them against a wall with just an edge hitting the wall. Make sure you also put a piece of newspaper between your wall and the doors. TRUST ME.
Tomorrow will be inside the cabinets.....


No comments:
Post a Comment